Sending Your First Notification
To make sure everything is set up properly, let’s send a test notification to your device.
A recap of what we’ve done so far is also the requirements for this section:
-
You have completed the Android FCM Credentials setup.
-
You know where to find the Player ID for your test user.
-
The game has Teak integrated and is building on a device.
-
You Allowed push notifications on your test device when the game prompted you.
-
You see your test device on the 5 Minute Active Users chart on the Teak dashboard.
Hello World (Push Notification)
Now let’s send our first notification to our test user. We’ll create a message from the Teak dashboard, select a test recipient, and see the notification show up on our device.
Create a Message to Send
In the Teak dashboard for your game, we will create your first notification.
-
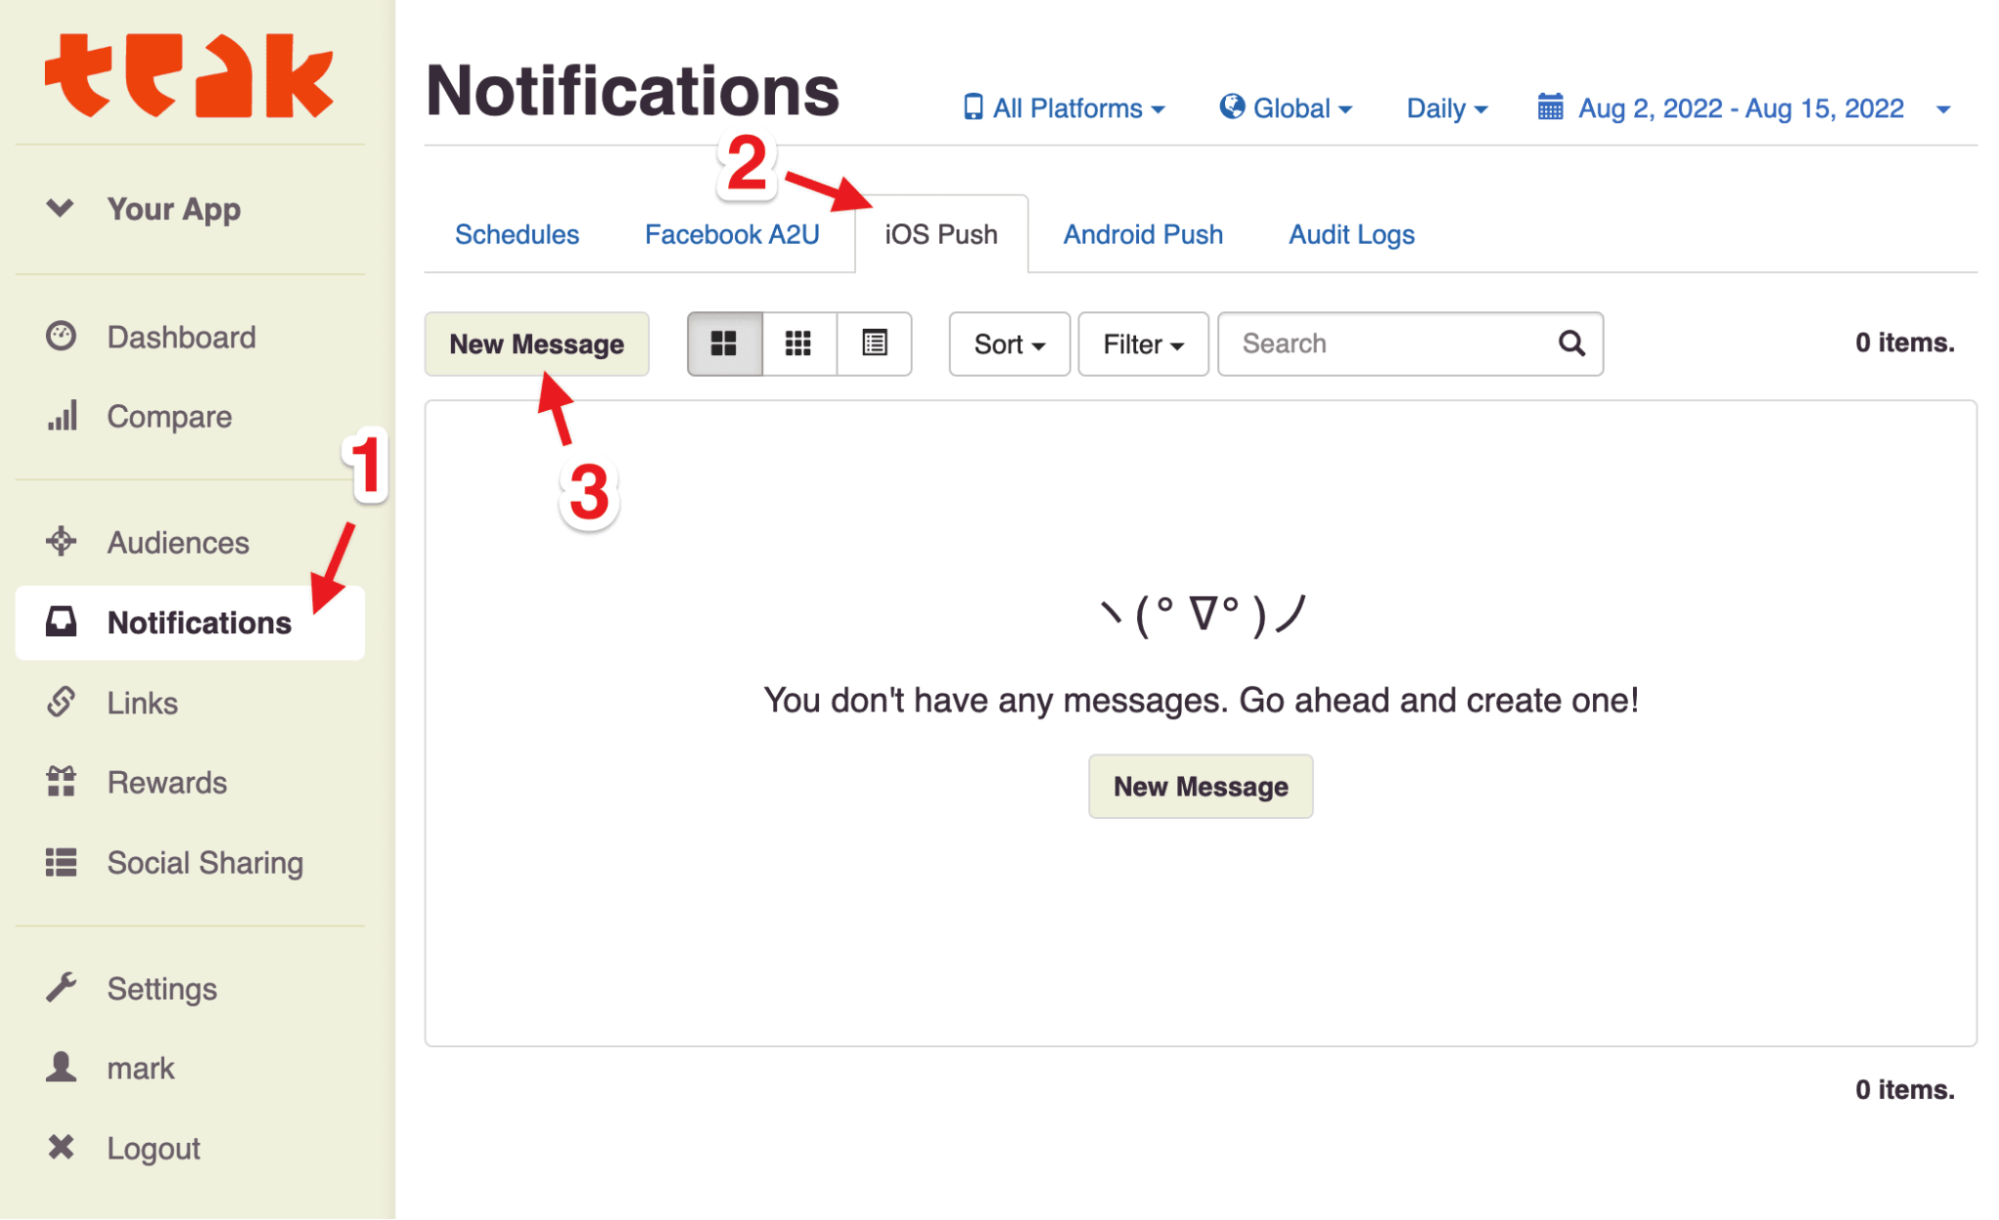
Click on Notifications, select the Android Push tab, and then click New Message.
-
Fill out the form in the modal. Give your message a Name, and select the platforms you want to create content for. Click Next.

-
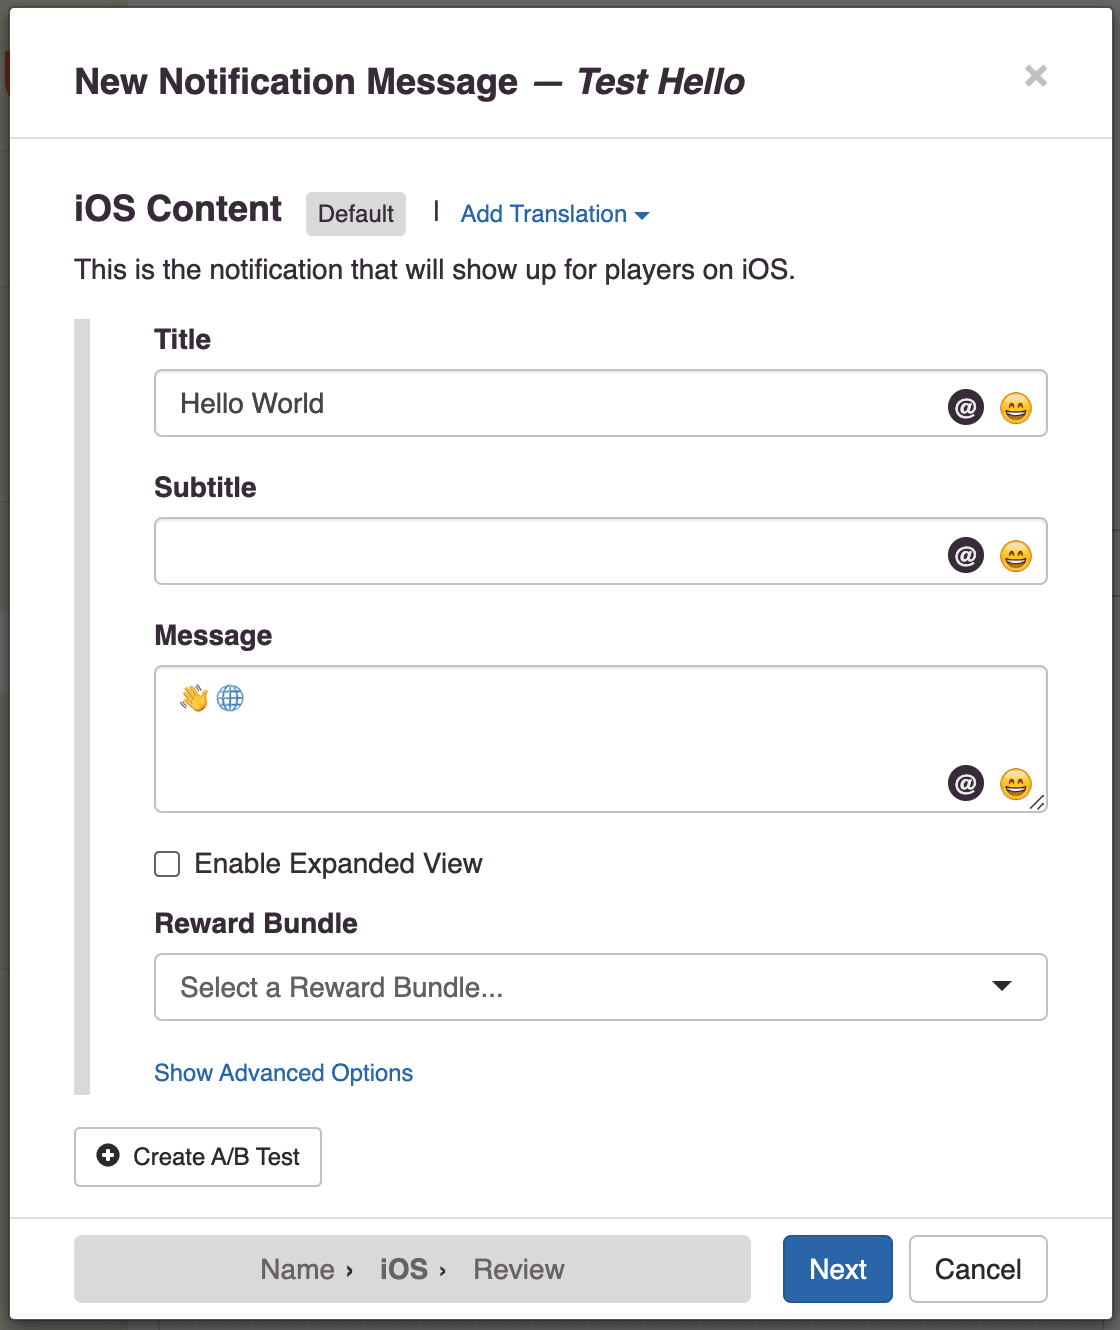
Enter your desired message content, and click Next.
-
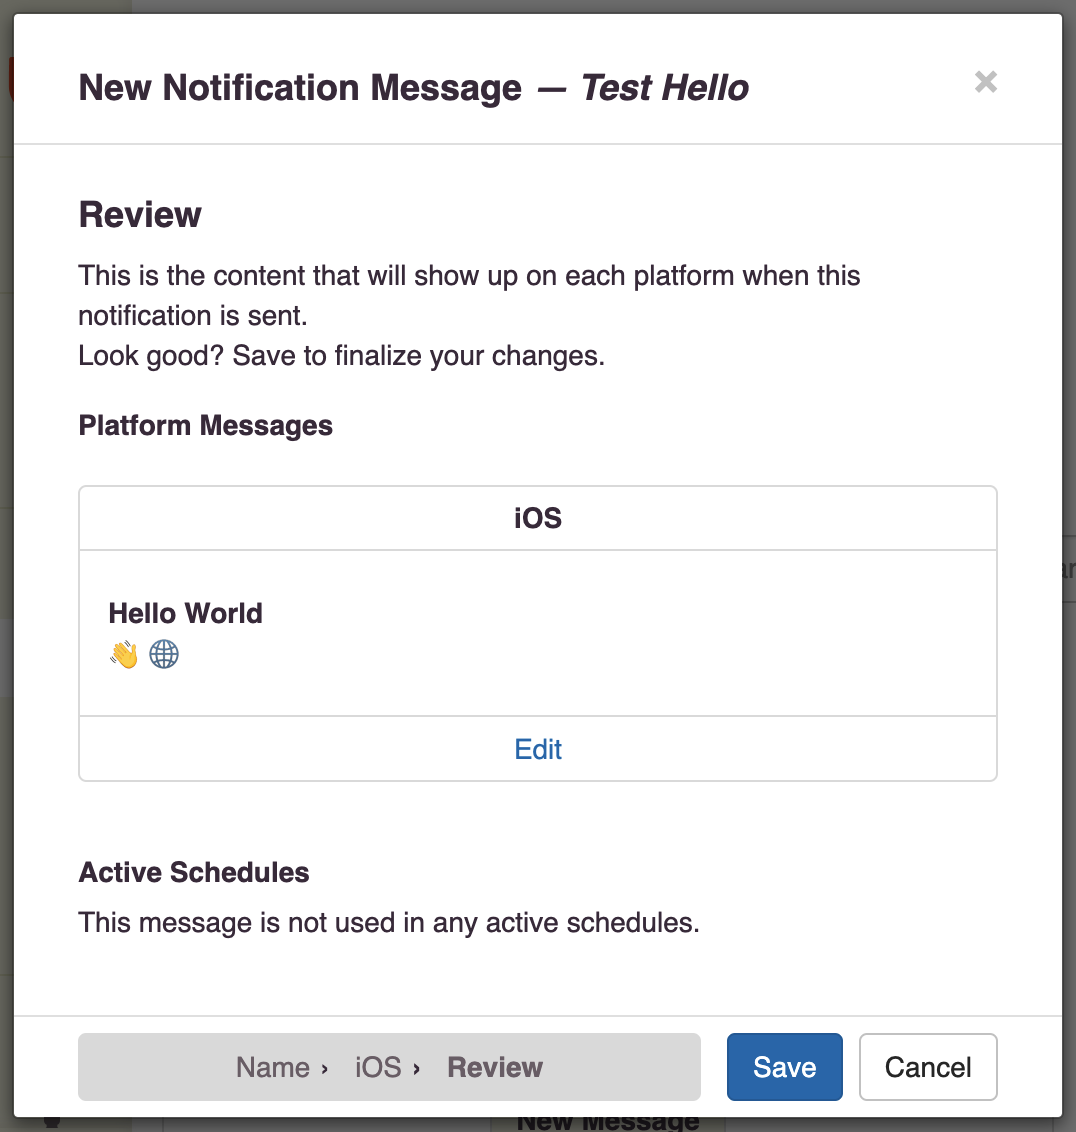
Review and save your message.
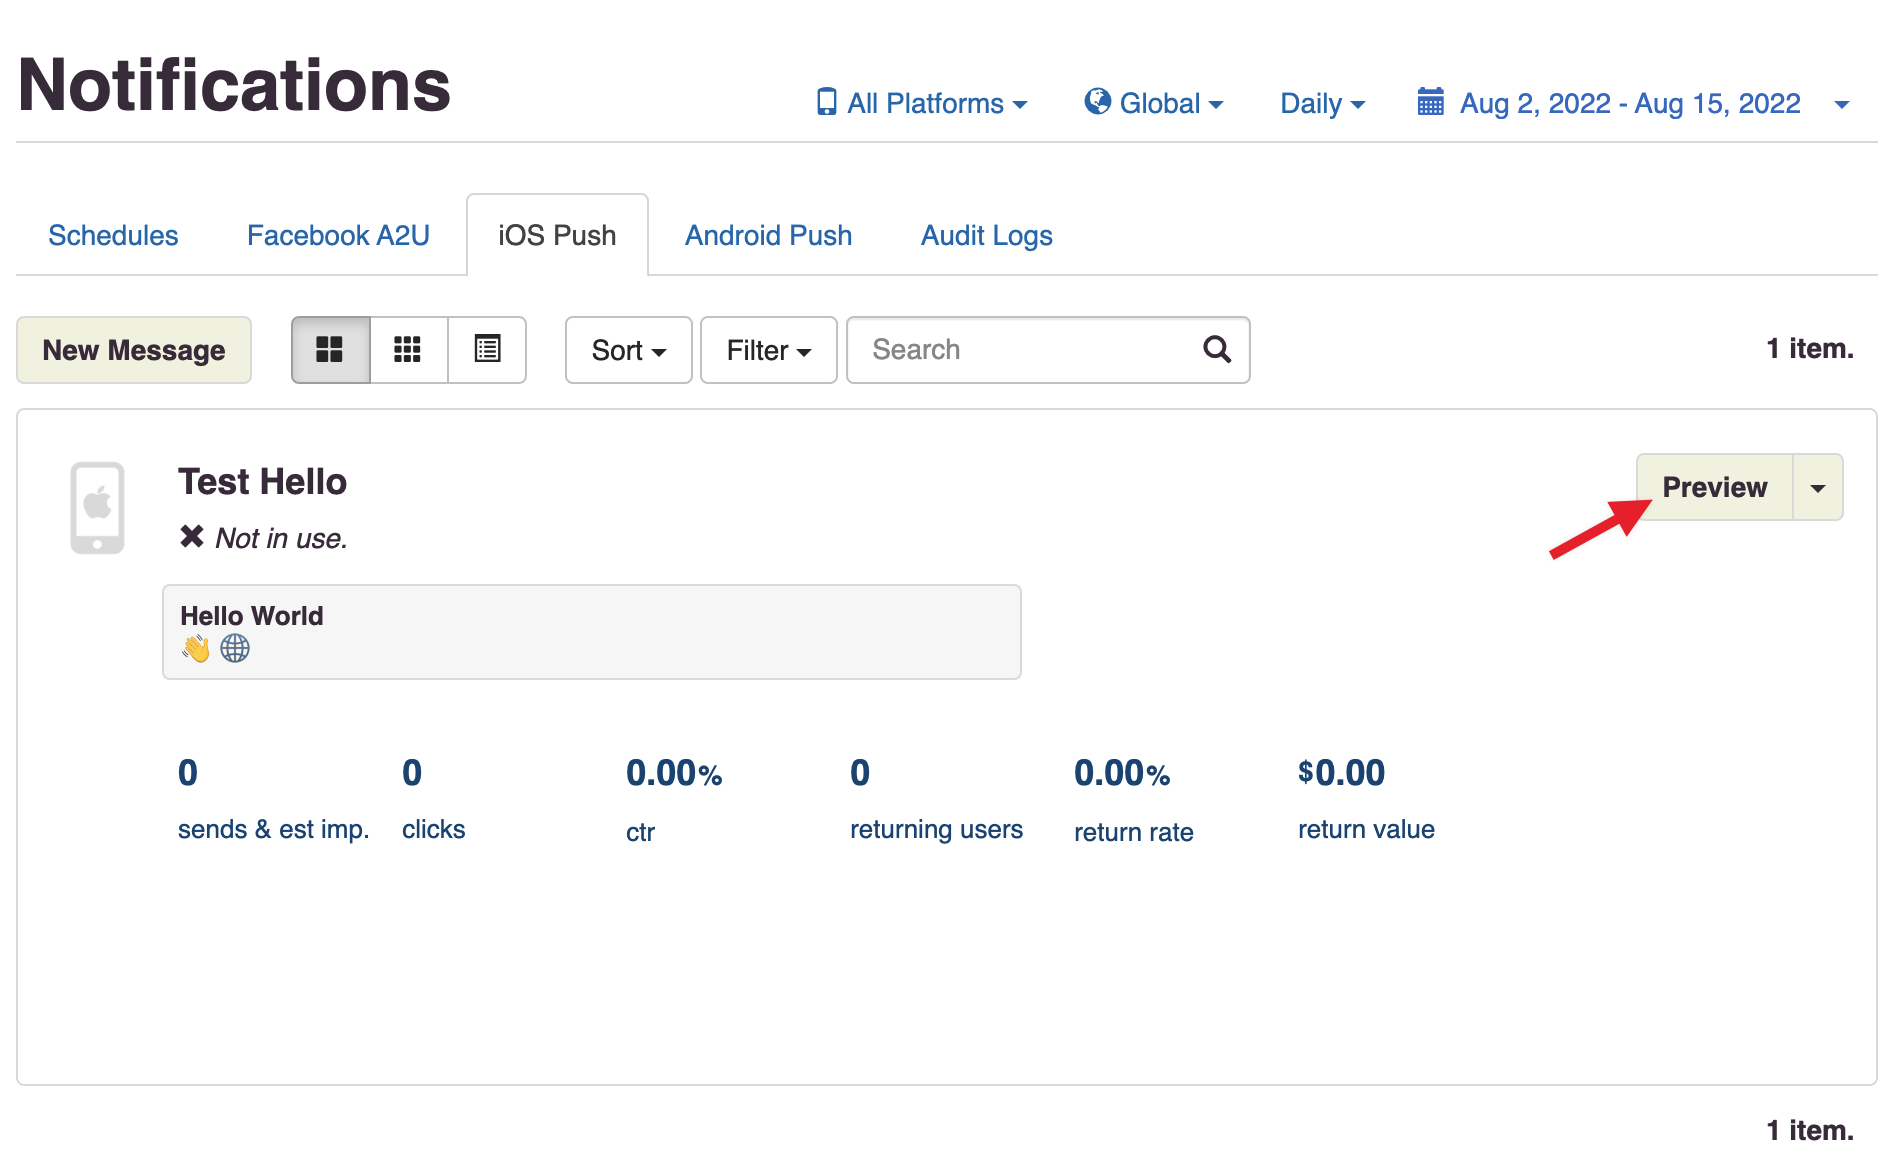
You’ll now see it in the messages list.
Now, we need to send our message to the device. We’ll use Preview for that.
Add a Preview Recipient
Usually in Teak, we send messages to whole audiences at once using Audiences and Schedules. But, for the purpose of testing, we can use the Preview functionality to only send to our test device.
To send a Preview, we need to tell Teak who we want to send to, and which of their devices to target.
-
You should see your message in the messages list on the Teak dashboard. Click Preview.
-
Then select Add Recipients.
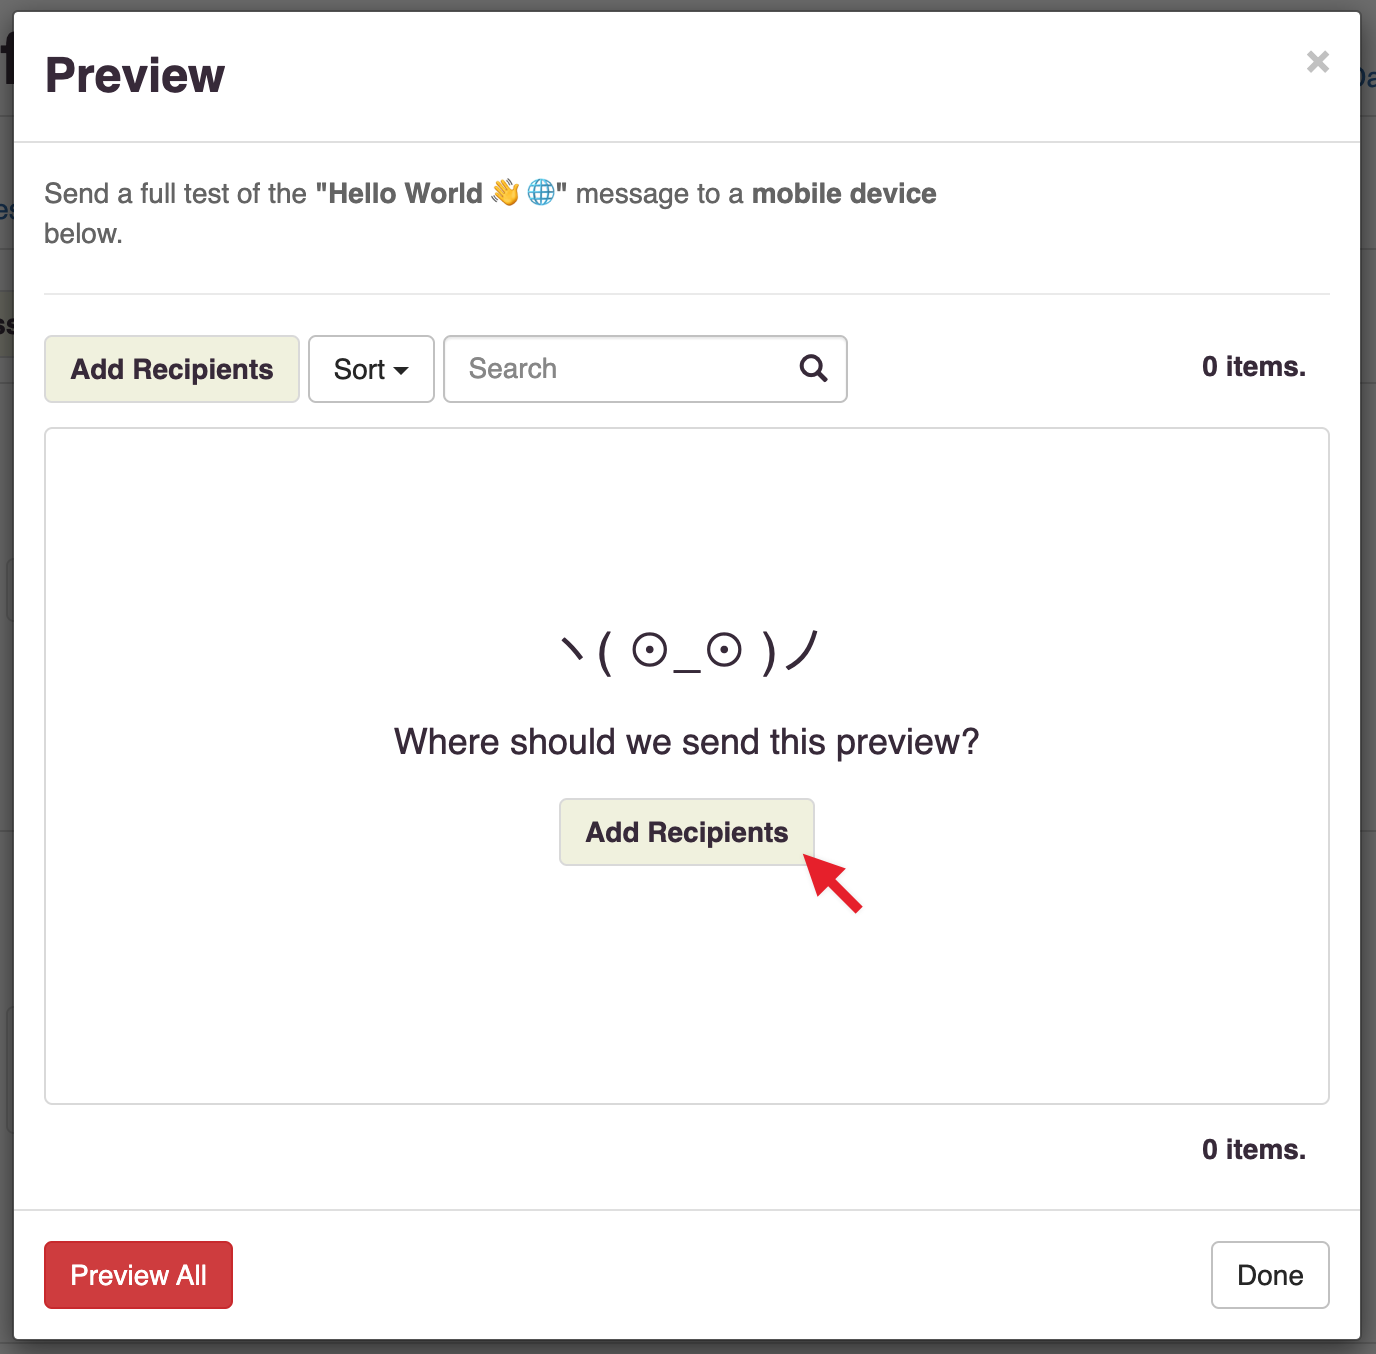
-
Enter your player ID (or
userIdentifier) in the Search by Game User ID field.You can get this from your game on the test device (if it displays the player ID) or from the console log (Teak outputs it when
identifyUseris called if trace logging is enabled). -
Click Search, and then click Register when your device is found.
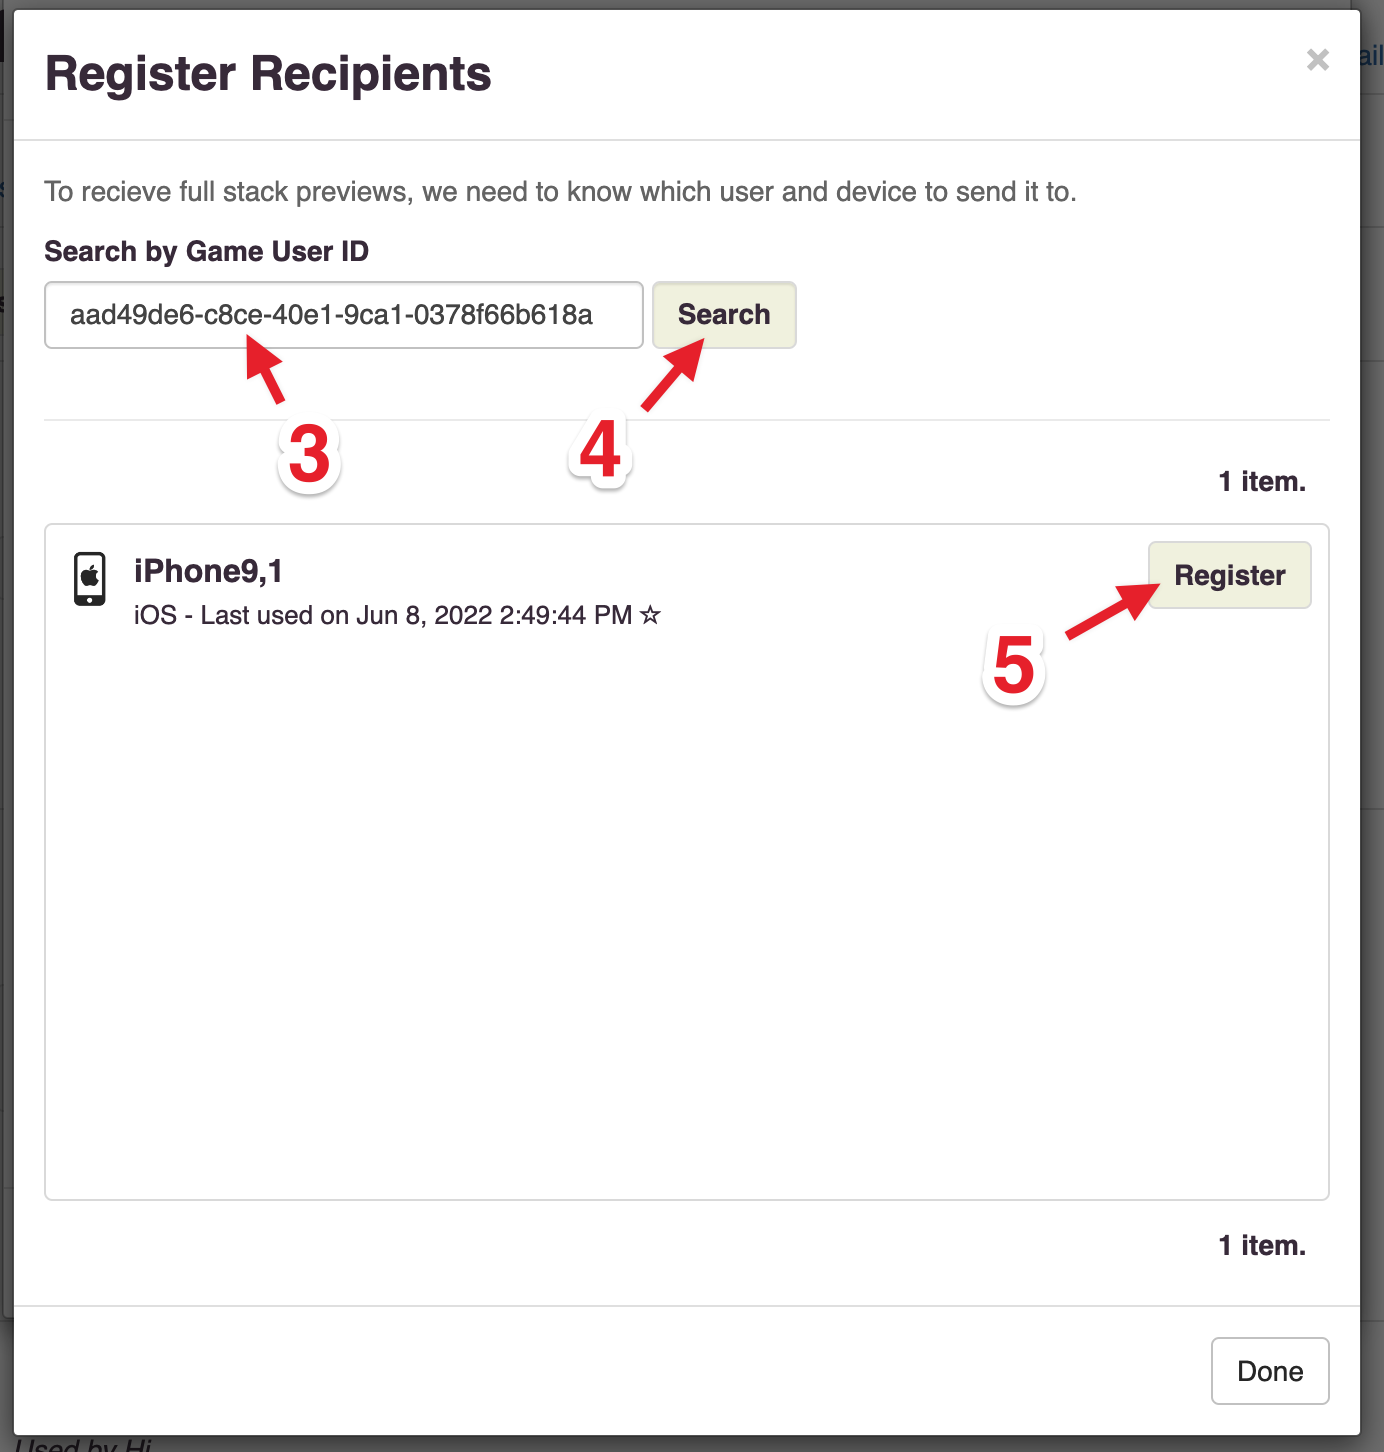
-
Add a label so you can keep your test devices straight, and click Save.
Other team members you invite to this game will be able to see your test devices, so choose a name that is helpful for the whole team.
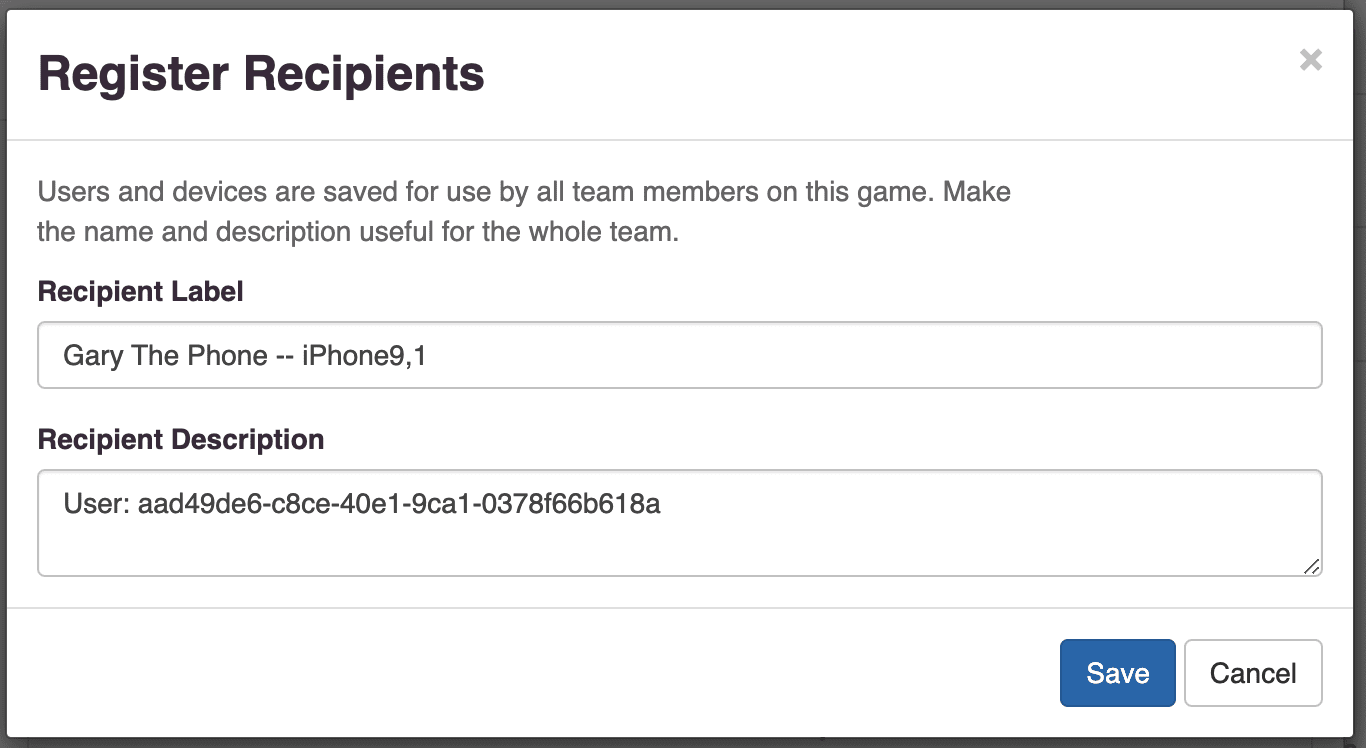
Your test device is now saved for this game. The next time you want to preview a message, you can just select your device from the list.
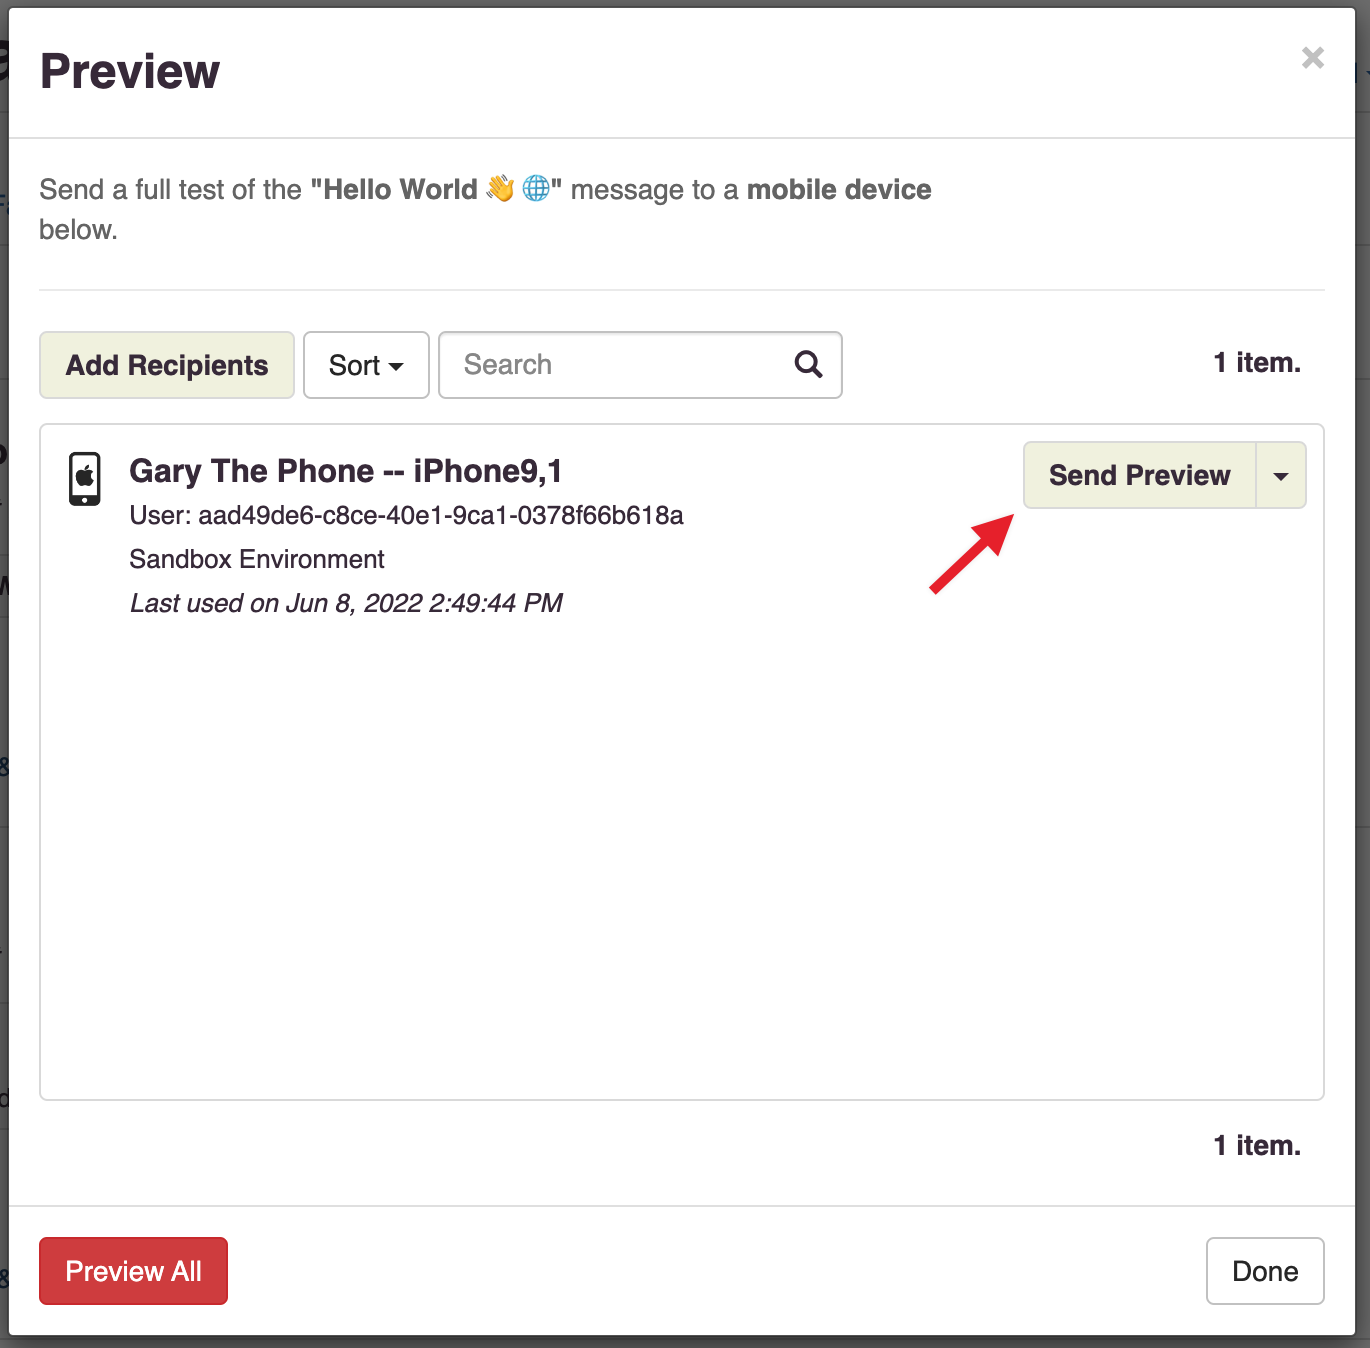
Receive the Notification
-
If everything is set up properly, the notification will show up on your device!

Congratulations, you’ve sent your first push notification using Teak!
Next Steps
Your initial Teak integration is done. Teak is set up to collect the data your CRM team will use to create and send notifications to specific audiences.
But there’s still more you can set up:
-
Ask for Push Permissions more strategically.
-
Set Notification Icons for your game.
-
Set up Deep Links to open your game to a specific screen.
-
Subscribe to Teak events, like reward claims and notification launches.
Proceed to Working With Teak for the next steps.